Back in Business!
Well, I went to Frys and the cheapest flash programmer they had was $200, so I didn’t get one. I started reading some more stuff online. The BIOS maker for my BIOS does include a recovery option: if you put the BIOS ROM file on a floppy disk it will load it at boot (only if the current one is bad). However, I saw complaints in Zotac’s forums that since newer boards don’t even have floppy connectors (SATA only), they were unable to recover from failed BIOS flashing. But, I did find that some machines have special instructions to recover from a USB stick, but those instructions were tailored to specific models.
So, I plugged in my USB stick when booting, and I noticed that the light on the stick would flash every couple seconds. So, I tried using the floppy instructions only substituting the USB stick. And what do you know! It recovered the BIOS and now we’re back in business. In fact, I’m writing this blog post from the CES computer!
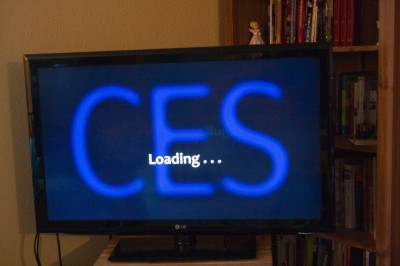
I tried changing the BIOS image to different formats and a couple different ways of flashing, but still no luck. I was using a tool created for the AMI type BIOS to automatically replace the image. So instead, I downloaded a newer tool that is more complicated and manages all assests in the BIOS ROM. Using this tool, I removed the current boot image and inserted mine, and this time it worked! Now, when I hit the power button on the computer, this is the first thing seen on the TV:
This was just a test image. I will create the final logo later and put some more time into it.
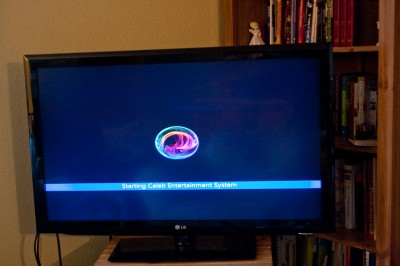
Next, here is the replacement text and animation for Windows boot up. This is seen immediately after the BIOS logo (click on picture to see larger image):
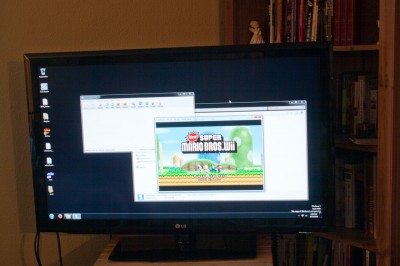
Again, its just a test with an animation I downloaded online. I’ll do my own animation for the final version. Here’s an image of Dolphin running Super Mario Bros. Wii:
Ready to keep moving forward!
Bricked :(
Yes, I have bricked the computer. But first, what’s been happening:
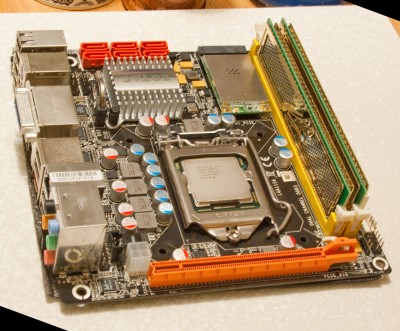
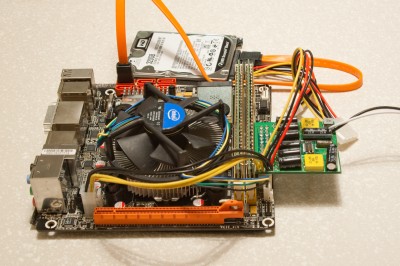
I received all of the computer parts this week, and put them all together outside of the NES to start playing around with stuff. Here’s the Zotac motherboard with the CPU (Intel i5-661) and RAM in place:
And next, the heatsink added on top of the CPU, the drive connected, and the power supply connected. Unfortunately, the power supply sticking out like this is too big to fit in the NES, so I’m going to have to get a simple extension cable so I can put the power supply board elsewhwere:
With everything together, I plugged it into the TV and booted it up for the first time. Of course, there’s nothing on the hard drive right now, but at least it works on the 42-inch LCD TV!
So, I installed Windows 7 64-bit so I could try a bunch of stuff out. Stupid Windows had me set the system clock after installation, and then decided that I was past my 30-day trial period. So it complained that I have not activated Windows yet. Anyway, I loaded on all the emulators I want to put on to verify they all work. And they do. In fact, even the Dolphin emulator (Wii emulator) works! It only works well at the native Wii resolution of 720×480, though. It looks really nice and better than the Wii at full HD 1080p, but it runs at about 20% speed. The only way to get good speed at high resolution would be to add a video card, and that simply can’t be done without a power supply that would take up too much room in the NES case. It still runs better than my other 3 year old Core 2 Duo computer.
I also tried replacing the Windows 7 boot up logo an animation using an online tool. I’d show a picture if I hadn’t bricked the computer, but it does work just fine. I can have my own text and animated logo replacing the Windows 7 boot logo (“Starting Windows” with the shining windows logo).
I fired up Netflix, YouTube, and some downloaded 1080p trailers from trailers.apple.com, and everything worked like a charm.
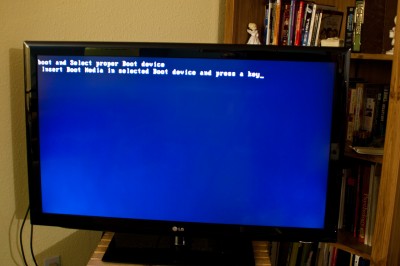
After all that was working, it was time to try replacing the logo inside the BIOS itself. When the computer is first powered on, it shows a “Zotac” logo screen. Now, the BIOS here is an AMI (American Megatrends Inc) BIOS, which is very common. And I was ensured by these instructions that it is very safe to replace the power-on logo. So I created a very simple 64-color logo in Photoshop, followed the instructions, and then wrote the new image to the BIOS. I shut the computer off, then powered it back on. Nothing. The computer will no longer boot, as the BIOS is bad.
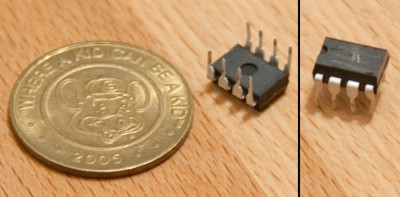
Now, I still don’t know why, but now I need to fix it. You can easily re-program the BIOS once the computer is on, but if it won’t turn on in the first place, then too bad. Fortunately (and I knew this ahead of time), the Zotac BIOS is a DIP (Dual Inline Package) chip that is in a separate socket on the Motherboard. This means I can remove it and flash it with the manufacturers BIOS. Here is the chip causing all this trouble, now removed from the motherboard, shown next to a coin for size:
The only downside is I need to purchase a flash programmer to connect to my other computer now. Fry’s has them, but I may be able to find a better deal on ebay. Once I get it, its only a matter of downloading the manufacturer’s BIOS and programming the .rom image file to this chip, then putting it back into the motherboard. Then I’ll be able to try again (and again) until I get it working.
But for now, until I get the flash fixed, the computer won’t even boot.
P.S.: For those of you that don’t know, a Chuck E. Cheese coin is pretty much the same size as a quarter.
Post Removal
A couple days ago I cleaned the NES case, as it had built up dust over the years and survived some sort of liquid spill. Note to future self: Don’t clean with 99.9% rubbing alcohol when you have bare hands and a cut on your finger.
Inside the NES case there were quite a few screw posts for mounting the various boards. But I’m going to need this space to pack everything in, so they had to go.
Of course, a Dremel is the easiest way to do this. But I didn’t have a Dremel. So of course, I had to get one! (Yay for projects). The Dremel will come in handy for making holes in the case for the rest of the project.
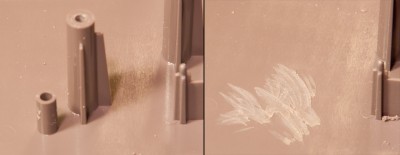
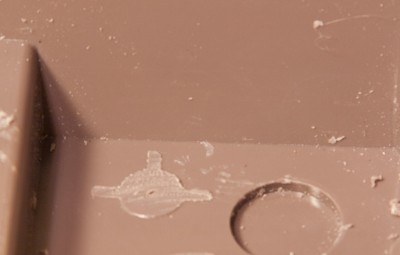
And remember, always wear eye protection and lung protection when using a Dremel. The More You Know. Using the Dremel, it was easy to remove the posts (and chip a few things off other stuff too). Here’s before and after of two of the posts:
This is my first time using a Dremel. As you can see, my later work after I got the hang of it is better than my first one:
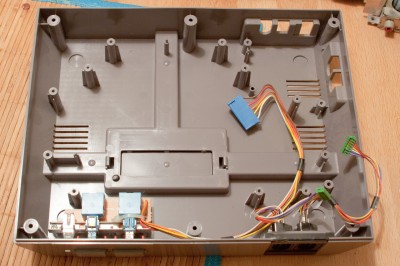
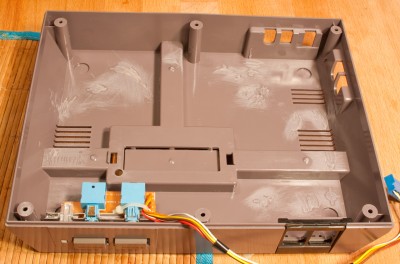
After removing all the posts, I used regular old sandpaper to smooth off the rough edges. Here’s the NES bottom with much more space available than before, shown next to my previous picture of it:
In four days (on Wednesday) I get all the parts (motherboard, processor, hard drive, RAM, and power supply) to start playing around with stuff. First thing I will probably look at is changing the Windows 7 startup screen.
I read up on cooling, and found a few cases of people using the same i5 processor I’m getting with the stock cooler and no case fans (in a Mini-ITX case). They had no troubles. So, I only got a couple of fans a spent a couple extra dollars to get quiet ones. I got a larger 60mm intake fan that is only 8db, and 2 smaller 40mm exhaust fans at 14db each. Bottom line, you won’t be able to hear them once you get more than a couple feet away. They should be sufficient to keep fresh air flowing through the case. I will be measuring the cooling performance, and can always add more fans if needed, but shouldn’t need to based on other people’s reports.
Original NES
I got my NES the other day off ebay/local pickup. It came with a couple games, so of course I had to plug it in and try out Zelda II: The Adventure of Link :). Unfortunately, it was of much lower quality than the emulators I’m used to. This could be due to my TV not properly de-interlacing/upconverting, but it also looked like there may have been slight corruption of the video signal.
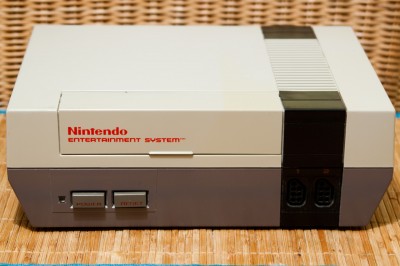
Here it is, the original Nintendo Entertainment System – there’s slight UV exposure damage (yellow discoloration) from years of life. You can barely see on the top where something else was covering it, and it is not damaged.
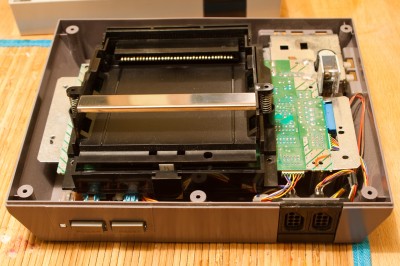
Here’s a shot of it with its top off – and IO shield removed:
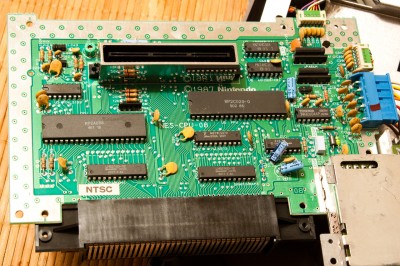
Here’s the underside of the main board. The only 3 connectors to it are the 2 joysticks and wires to the Power, Reset, and power LED. The power supply module is soldered on with a ton of solder, as can be seen in the previous picture.
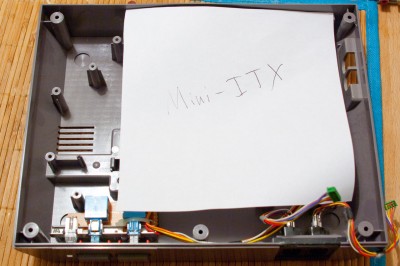
Here is what I have to work with. The insides are all removed:
I made a template for a 6.7 x 6.7 inch Mini-ITX board. As you can see, its going to be a tight fit. In order to keep the original power/reset switches, I’m going to have to mount the board with some space underneath. That’s likely where I’ll put the hard drive, then.
The inside dimensions of the NES are: 9″ wide, 7.75″ long, and 3.25″ tall.
I’ll be using the various vent holes visible to put fans on for airflow. I’ll likely add a large intake hole on the back as well. There’s vents on the top of the whole right side. I imagine the airflow will be intakes on the left vents (plus added vent on left rear), and exhaust on the right side vents. I may add vents to the bottom if necessary too, and the existing holes on the right (originally composite video and mono audio jacks) will probably become a vent. All this venting will depend on the CPU temperature when running stress tests.
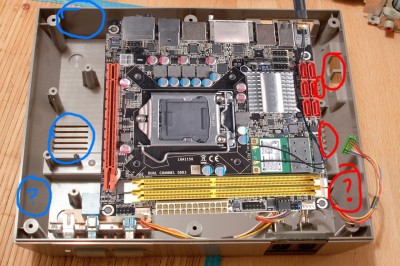
Finally, here’s an image of the bottom with the Zotac board photoshoped in the same size as my template. I played around with this to determine airflow. I marked potential intake vents in blue and exhaust in red. I still need to research this some though, to determine if maybe more intake is better and reverse the flow since there’s a huge top vent on the right.
The Plan
Alright, here is the tentative plan at the beginning of this project:
Goals
The final outcome is to be a portable entertainment center based on a computer platform. It will contain emulators for the older game consoles and play them back at 1080p HD. It will be able to play Netflix via web browser. It will be able to play HD content from saved files stored on an external hard drive or USB stick. It will also play music from disk or Internet Radio. It will be able to do a photo slide show from pictures on a hard drive or USB stick.
At this time I don’t plan to make it a DVD player. However, I am designing in support for a DVD drive in case I do decide to add basic DVD and CD playback capabilities.
Motherboard
The motherboard is going to be Mini-ITX, which has a size of 6.7 x 6.7 inches. I think I’ve decided upon the Zotac H55ITX-A-E. The nice features here are: Integrated graphics when paired with the right processor, HDMI out and VGA out capability, built-in WiFi (n) with external antenna, and 10 USB ports plus headers for 4 more.
The integrated graphics is Intel’s latest, and while it doesn’t compare to a video card, there won’t be much heavy 3D going on anyway. It should be just fine for displaying video and light 3D work such as the Nintendo 64 emulator. Besides, there’s really no feasible way to get a video card inside the case anyway without ugly power solutions.
Processor
The processor will be one of Intel’s latest, the Core i5-661. This is a dual-core, 3.33 GHz processor. Choosing the latest technology will make sure that high-definition video decoding will work without a hiccup. For emulation, a higher clock speed is better than more cores. However, there are a couple emulators now using 2 cores. MAME is 95% processor reliant, so this should allow some of the later arcade games to play. And video decoding also benefits from 2 cores. Overall, it should be more than fast enough for all the goals, ensuring a more trouble-free experience. And, I should be able to crank up quality settings in the emulators/applications, too.
RAM
This machine is only going to be doing a single task at a time, and will not be using any RAM-intensive applications. It could probably get by with 1GB. 2GB would allow a decent experience with Windows 7 (Win 7 minimum is 1GB, but recommends at least 2). Nevertheless, since RAM is so cheap these days I’ll be getting 4 GB of OCZ Gold DDR3 1333 memory for $40. This is fairly decent performance RAM – 2GB of equivalent RAM would be $30, and the value RAM at 2GB I found for about $25. So its a no-brainer to just get 4 and call it good.
Hard Drive
This being a portable unit and going to be used by a small child, an SSD would make sense. However, that’s too much for the budget. Since I don’t plan on actually storing data permanently (files can be copied to it to be played, but they won’t live there), I only need to make a backup image of the hard drive in case it ever fails. So, I’ll get a Western Digital 320GB, 7200rpm Notebook SATA drive (WD3200BEKT). I may need to figure out some sort of automatic network backup of game save files.
Power Supply
Ah, the most difficult part of small enclosure builds. My maximum estimates show the above system would use about 139 Watts (if DVD drive included). This is pushing the limits of what’s possible on the cheap and with an external power brick. Due to size, the power brick must be external, and this is mainly why a video card won’t work, simply because even if you could fit it in, you need an internal power supply or some expensive solution (or ugly, inconvenient solution). I was able to find a power-supply combo with an external power brick (like the one that powers laptops) and an internal power supply that can go up to 150 Watts. Hurray!
Input
The primary input method will hopefully be gamepads. I hope to be able to design the software such that keyboard and mouse are usable, but optional. I want to be able to have the original gamepads for each emulator, but cost may prohibit that. I’ll definitely get the original NES, but we’ll see how many of the others. I haven’t decided yet if I want to just purchase them from RetroZone, or get some from ebay and modify them myself using cheap $5 gamepads.
I also want to use Wii remotes. There are easy to use open source drivers for these online already. They communicate via Bluetooth, so I could get a simply Bluetooth dongle for the computer. The Wii remote can be used as a mouse too – I could easily build a “Wii Sensor Bar” into the CES by just cutting 2 smalls holes in the corners for each infrared LED. This would require the CES to be near the TV though. I could also get a broken “for parts” Wii online and extract the sensor bar connector and integrate it in the back somewhere.
Software
OS: At the moment, I’m thinking of Windows XP since I have one spare copy laying around. However, I am also considering Windows 7 since this is on a 64-bit processor, and I could have Windows 7 64-bit then. There is one emulator in particular (discussed below) that benefits from 64-bit and that actually might need it.
I plan on writing the GUI entirely myself. There are just some automation things that the emulators don’t support yet, like automatic button reconfiguration based on which joystick/gamepad is currently plugged in. I’d like to be able to automate this as well as provide an interface that can be navigated and launch programs without using a keyboard or mouse.
I also plan to completely re-skin the system. The motherboard BIOS is from a common BIOS manufacturer, and there’s instructions online to replace the BIOS startup logo in the BIOS code. If I kill my BIOS, it is just a flash DIP chip that can be re-programmed with an external programmer, but I’d have to spend $30 for a simple programmer, or find someone who has one. Crossing my fingers 🙂 I also would replace the Windows startup logo, and everything. So when powered on, all you would see is my graphics until the system boots and the GUI comes up (also done by me). However, I’ve read it is difficult to replace the boot logo on Windows 7. But I can always just blank the screen, so if I need to go 64-bit, I may have to live with that. Need to research it more.
Emulators: I plan on the following Emulators. Of course I could easily add more later: NES (of course), SNES, N64, Sega Master System, Sega Genesis, Sega Dreamcast, MAME, and possibly Dolphin. My software would launch the emulator and automatically re-configure the button layouts based on what gamepad is plugged in. I’d have to create mappings from each emulator to each gamepad. It could also warn you that you’re using a gamepad that doesn’t have enough buttons for the emulator (like trying to use an NES gamepad to play SNES).
The Dolphin Emulator
Lastly, I was recently intrigued by the Dolphin emulator. It is an emulator for Wii and Gamecube, and allows you to play them in HD! (The Wii is limited to ED, or Enhanced Definition, which is practically SD). I tried it out on my computer, and it actually works! Although performance was pretty bad on my Core2 Duo 2.4GHz. So, I’m hopeful I can get a little better success with the i5 3.33 GHz processor. This emulator benefits from 2 cores (not more, though) as well as a 64-bit OS, which is why I may need Windows 7. I might try installing Windows 7 but not activating it. That way I’ll have 30 days to test it out and see if I can get Dolphin running acceptably – and if not, fall back to Windows XP. The guys on the Dolphin forums say its about 50/50 with regard to how much processor and video card affect performance. Then again, my other system’s video card is quite old – the Intel HD graphics has a clock speed just over twice that of my current card, and the memory bandwidth is 4 times as much, and integrated with the system CPU/RAM. We’ll just have to see. Maybe it will at least play Gamecube games.
Welcome to the Caleb Entertainment System Blog!
Welcome to the Caleb Entertainment System Blog: An adventure in computer building.
I am Bobby Byam, and this blog chronicles my first home-built computer.
In January, 2011, my wife Patti and I decided to use part of our tax refund to build a device that would help entertain our son, Caleb, as well as have other useful features. I’ve had the idea for awhile now to put a computer inside an original Nintendo Entertainment System case and put an NES emulator on it. Now, that dream is becoming a reality and it is going to be much more than just an emulator.
I decided to blog about this and document my steps and struggles. This is my first computer build ever. There is plenty of well explained info on computer building online, and in theory it is pretty straightforward. However, I’ve heard there can be many gotchas and other hurdles in practice, especially if you’ve never done it before. To top it all off, I’m going to be cramming a 1080p HD-capable media player in to the inner dimensions of an original NES case.
Given my tendency to thoroughly plan out sizing, yet still manage to get it wrong, along with all the unknowns about the project at this time, it truly is going to be an adventure. Hopefully my experience in software, firmware, and robotics engineering will help out along the way. Its definitely going to be a challenge, so sit back and come along for the ride!
