Archive for August, 2013
It fits!
Just when I got started going again, the company I worked for went bankrupt, and that brought things to a halt while I spent my time looking for jobs and brushing up for interviews. But that’s all in the past now, and recently I’ve got my inspiration firing again. The CES has been sitting behind the entertainment shelf, on the floor, partially exposed for a long time now. Things have flown back there from time to time, but thankfully nothing got hurt. I finally decided to stuff this thing inside the case.
There were two issues getting it in. As can be seen in one of my early images, the NES has a large raised plastic section running across the bottom. That had to go in order to be able to fit the hard drive and other wires underneath the motherboard. So out came the Dremel, and off when the plastic:

To cover the hole, I got a piece of clear acrylic sheet from the hardware store and cut it to size with the Dremel. Man, that stuff makes a lot of mess. The Dremel turns acrylic into cotton candy, so I looked like I was attacked by a spider when I was done. I went to the store with a NES controller in my pocket and found an almost perfect match for the gray color in spray paint – for the top half which is light gray! I realized when I got home and looked at the bottom and remembered it was dark gray. However, I decided that for one, the bottom will be hidden most of the time, and two, the contrasting light gray would probably look better anyway than a close but not perfect match of dark gray.
So I painted the piece and secured it on with hot glue. Looking back, I probably should have used epoxy for strength, but this piece shouldn’t see too much stress. And if it does come off, I’ll just epoxy it back on. Here it is attached, from top and bottom:


That took care of the first problem of stuffing things inside. The second problem is it wouldn’t fit, and couldn’t be held in the correct place with mounting standoffs, until the hole was cut in the back for the motherboard backplate. I only got one chance at this. If I screwed up the NES case, the only options were to live with it or start over with a new NES. So I carefully made a pattern of the backplate size. I then tested using this pattern on a piece of the left over acrylic. I then accidentally threw this pattern away when I was cleaning up that night. So the next night I made, and tested, yet another pattern. I made sure not to throw it away.
Now I was ready. I traced my pattern on the back of the NES, carefully attempting to align the position to the correct height and location of the motherboard sitting inside. It straddles the top and bottom half, so I did the bottom first. I erred on the side of too small, and kept checking the backplate and fine tuning it. Then I did the same with the top. Finally, I lined up the motherboard, drilled holes for the standoffs, and put it all together. It worked! And it looked pretty good too. And then, as I was sticking some other stuff in there, I realized a huge oversight – I had put the motherboard (and therefore the hole in the back) in the wrong place.
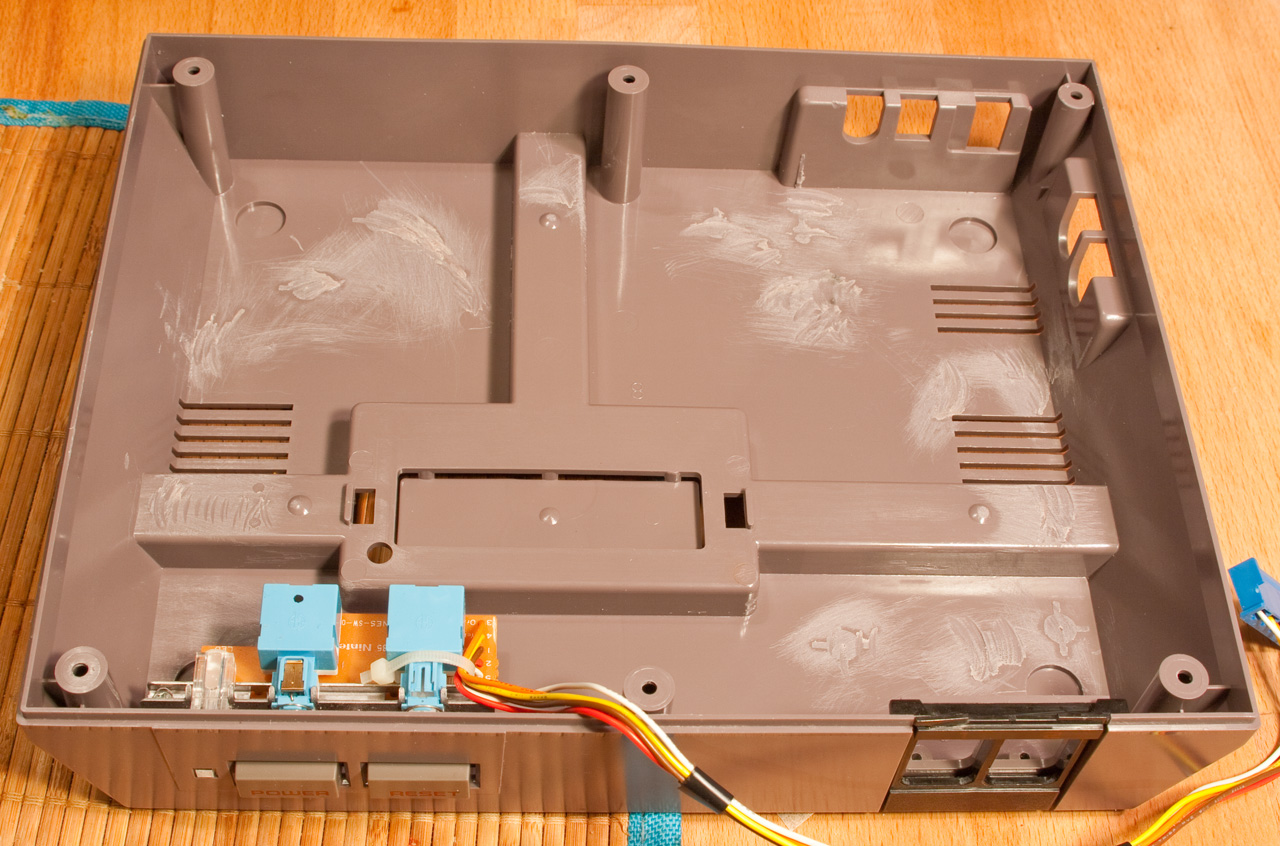
I had forgotten awhile back, that I mentioned in a post a year and a half ago, that I determined that the reset button could stay as long as I removed a section of the power/reset/LED board and put the mounting standoff right through that board. Well, I had that little board out so I could line everything up and forgot there was only one place that standoff could go. And I didn’t put the backplate hole where that standoff would line up there.
VERY lucky for me, I was only about 1/4 to 1/2 inch off of where it should be. Phew. After a lot of mulling over of options such as moving the hole 1/4 inch over and trying to figure out how to fill the gap, I realized that I could just rotate the motherboard slightly and get that standoff to be in an acceptable spot. This meant that the backplate was no longer parallel with the back of the case. The motherboard is too deep inside the case by about 1/8 inch on one side. But it still doesn’t look too bad, and its a lot better than trying to move the hole over. I also had to drill new holes (leaving extra holes on the bottom) for the new standoff locations. Here is a picture of the power/reset/LED board with the standoff going through it. The removed section means I will have to connect directly the LED leads to power it instead of the wires at the other end of the board. As you can see, it must go here and can’t be moved to either side or it would go through the reset switch or the power LED or the rubber foot on the bottom of the case.

Next is a picture with most things stuffed inside and the motherboard mounted. I have yet to Dremel some holes for the fans and secure them in. I’ll figure out final wire routing when everything is inside (still missing the Teensy internal controller and connections, and the USB hub).

The hard drive is attached to the bottom underneath the motherboard with Velcro. I picked up this trick from a robot we built at the robotics company I worked for a few years back. You just have to be careful not to cover any hard drive holes 🙂 Lastly, here is the back with the top on and screwed in. The front looks just like any other NES, which is the idea.

The power connector is hanging out the back because I haven’t drilled a hole or decided where to mount it yet. But, for now, the CES is actually portable!