Archive for March, 2012
NES Controller conversion
Alright, I uploaded all the pictures for this a year ago right before my computer’s hard drive crashed. I successfully converted one original factory NES controller to be USB with a 9 foot cord. Here’s the details:
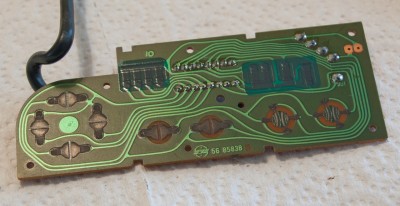
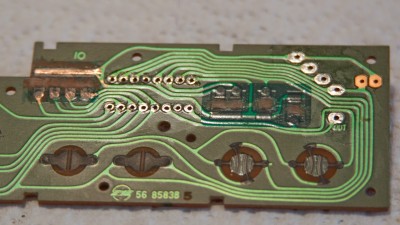
I opened up the NES controller to see what I was dealing with. There were standard button pads, a chip, and connections for NES wires:
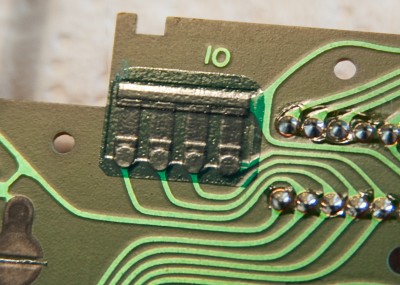
After inspection and testing, I found that there are actually resistors on the board itself – basically just a bunch of resistive material in chunks on the board. These resistors appear to be pull-up resistors, making the voltage going into the chip high whenever the button is not pressed, and then low when the button is pressed. You can see 4 of them (out of 8 resistors for 8 buttons) here:
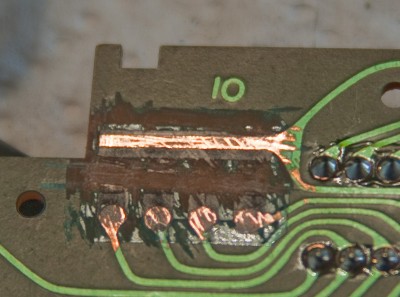
The JoyWarrior chip I’m using calls for open connections (not connected) when the button is up, and closed when down. So to be safe, I scratched all of these off with a miniature standard screwdriver:
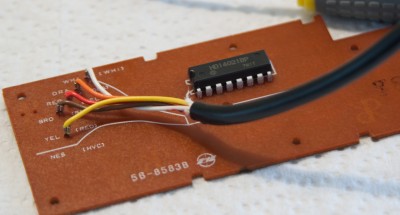
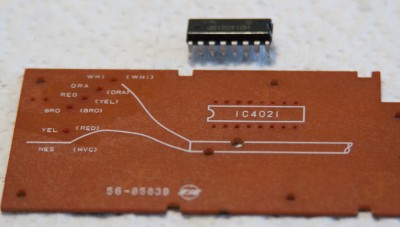
Next, I removed the chip and wires connecting the factory cord:
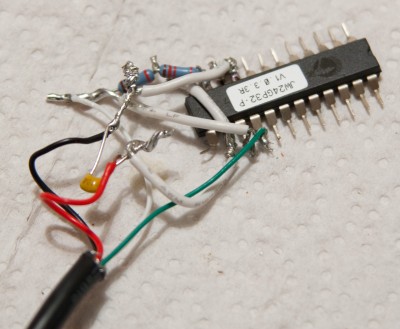
Then, I simply re-created the circuit I prototyped on the breadboard earlier in as small of a space as I could. This took a lot of time, and partially because my soldering iron tip was getting very old and was difficult to work with. Vertical space was very limited, so I had flatted out the pins on the JoyWarrior chip and was trying to solder the wires directly to the chip pins. There was a lot of frustration getting that solder to flow, especially in such a small space! I now keep an extra tip stocked at home at all times. Here’s the completed circuit, without button connections:
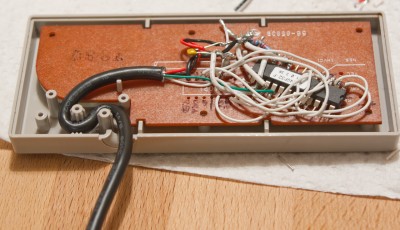
All that was left was then 1 wire for every button, plus 1 ground, from the chip to the NES circuit board. When it was all in place, I put in in the controller and flattened as much as I could. There is a bit of pressure which holds the chip still when the back is screwed on, so I didn’t need to glue it or anything. Here it is just before screwing the back on:
And it works pretty well! I have occasionally noticed some buttons take a bit more pressure than others to activate. I have seen a “gamepad restoration” tutorial online that says this normal wear and tear can be made like new by gluing small pieces of aluminum foil to the buttons, so I may give that a try at some point.
This controller conversion really was a lot of work. I may just get one of the online USB replicas for the second controller, at least initially to see how it works and feels.
Current Status
Well, it has been over a year since my last post. I was in the thick of it when my primary computer’s hard drive crashed. I had just finished one complete NES controller conversion with the JoyWarrior chip and done some other case work, and then the only other computer in our house became unusable. I was considering getting a new computer, and decided if I was going to re-install everything, it was best to do it only once. I also had a friend’s wedding photos that needed to be done and had to wait for the tax refund to come in to get the new computer. All of this, combined with Caleb becoming more and more social, sort of derailed everything. However, since then, the CES has been used in our living room as a general purpose computer for web browsing, Netflix, etc., and has been working great.
I will post shorty the NES controller conversion I had done. Now about the case – I had purchased some standoffs to mount the motherboard onto inside the case. I picked a size that would put the board just above the NES Power/Reset switch board. Unfortunately, they are just barely too high. I tried re-arranging all I could, but it looks like the Reset switch is going to have to be sacrificed in order to fit everything in and get the top on. (UPDATE: It actually does fit, see “Case and Controller Solutions”) I was planning on using the Reset switch as a way to exit out of whatever full screen game was being played and get back to the game browser. But I guess I will have to do something else, like mount a simple button somewhere, or maybe I can hook the Reset button to some other internal button, but the factory button and mount is just too big and in the way.
I don’t have as much free time as I once did, but I will continue to work on this project as I have time. Caleb is 18 months old now, and really won’t be using it for games until he’s at least 3 or 4, so I have some time 🙂
