JoyWarrior
I’ve run into a bit of a dilemma with the gamepads. I want to be able to just automatically configure each emulator for whatever gamepad is plugged in at the time, and also be able to disable emulators if a non-compatible gamepad is plugged in. For example, with the SNES controller, you can play either SNES games or Nintendo games. But you can’t do it the other way around because the NES controller does not have enough buttons to play SNES games. I’m planning on building 6 controllers, using 2 more standard out-of-the-box controllers, and then the Wii controllers. I’ll build 2 NES, 2 SNES, and 2 Genesis controllers. The 2 out-of-the-box controllers will have 2 analog sticks each and be used for the N64 and PS2 emulators, and Wii can be for both the Dolphin emulator and NES.
The automation is necessary for Caleb, or anyone, to be able to use it easily. If I don’t do this, then before you can play a game, you’ll have to go into the set up and configure what buttons map to up, down, left right, B, A, etc. This is just too much of a hassle. When its all automated, it will be set up when the emulator launches. The correct button on the controller will be already mapped to the correct emulator button, and it will just work. For example, if you launch the NES emulator but have the SNES controller plugged in, it will change the NES emulator settings to use the button in the closest position to the NES controller to be used.
However, in order to be able to do automatic configuration, I need to be able to tell what controller is plugged in, and that’s where I’m running into trouble. All of the gamepads and chips I have looked at do not have serial numbers. So if I used one type of store-bought gamepad, or one type of chip, for all 6 I’m building, there would be no way to tell which one is which when plugged in. (UPDATE: I have found a better solution to this problem, see “Case and Controller Solutions”)
So, what I’ll have to do is build each of the 3 different types in 3 different ways. For NES, I’m going the pure method: real NES controllers converted to USB. For SNES, I’ll probably get replicas that are already USB with similar authentic feel (but not exact), and for Genesis I can just use a cheap store-bought gamepad and rip out its internals and put them inside the Genesis controller. This way each type will have a different USB Vendor ID and I can tell them apart.
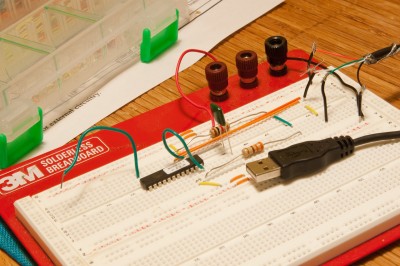
I ordered a joystick chip – the JoyWarrior – to try it out in hopes it would have a serial number (other chips from the same company do). It didn’t, but I still can use it for the NES controllers. I got the chip, and it has a very simple circuit. I dug through my spare electronics parts and found a suitable capacitor and resistor, dug out my breadboard, and put the circuit together. I found an extra USB cord and cut one end off. Then, I plugged it into the computer, and there it was – a new joystick found. I simply connected a loose wire from the chip’s pins to ground one at a time to test the buttons. Here is the breadboard all set up:
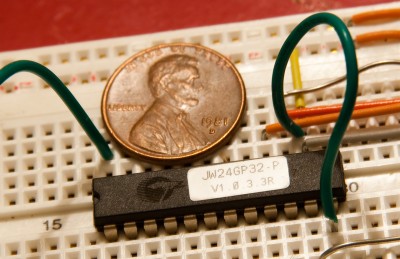
Here’s a close up of the JoyWarrior chip:
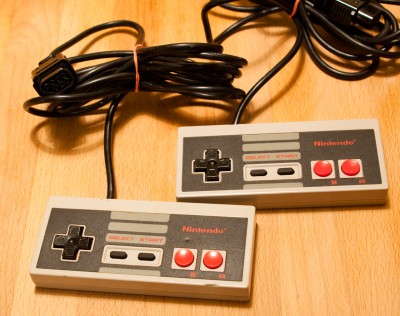
I also got the NES controllers in the mail. I found them on ebay for $5 each. These are real, used, original NES controllers. I hooked up the old original Nintendo board again to test the controllers, and they both work great. They’re a little bit dirty, so I’ll have to open them up and fully clean them.
The spare components I had (capacitor and resistors) are much bigger than they need to be, so I’ll pick up smaller ones at the store and then figure out how I’m going to build the circuit and stuff it in.
Next Post: Current Status


